 |
Liana's kitchen after hours of sanding
|
I have seen tons of entertainment turned play kitchens through Pinterest and have been really wanting to make one for my daughter. Months have gone by and still had yet to find that "perfect" piece of furniture to turn into my daughters kitchen. That was until I went to my friends fundraiser yard sale. I found the perfect little TV stand. Most people would just look at it and move on, but I saw potential. I only wished I had taken a photo of it before I started working on it.
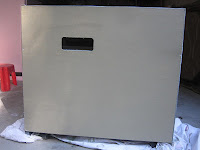 |
| The back of the kitchen, freshly painted |
It was black to start, I didn't want a black kitchen so I sanded it down, took hours, and used a spray paint can of primer on it. Then we (well, my friends husband) cut a hole at the top with a jigsaw for the sink to go in. After a little more sanding, it was ready to be painted. I went with green because that's what I found for free from a friend! (This project is on the cheap after all).
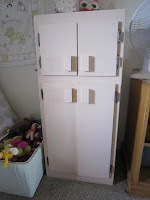 |
| Liana's fridge |
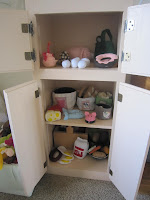 |
Fridge filled with tons of
felt food goodies |
That same day I found the perfect cabinet to be the fridge. All I had to do to it is take a large piece of wood off the top (later used for the kitchens back splash) and paint the whole thing. Pretty simple.
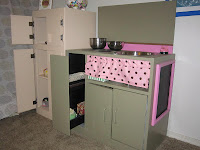 |
| Her "almost finished" kitchen |
Back to the kitchen: After painting, I Gorilla glued black Cd's onto the top for burners, placed the sink in the hole, and screwed on the burner knobs. I have yet to find a facet that I like (which is why this kitchen is "almost done"). I nailed on the black splash and gave it some trim. I also added a few hooks at the top to hold pot holders and measuring cups, etc.
I took an old frame, painted it pink, took some chalk board paint and glued the frame around it to make Liana her own "menu board."
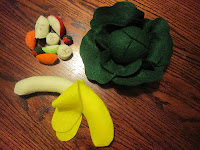 |
My latest felt food creations:
fruit medley, lettuce, and a banana |
I last thing I added was a tension rob with a curtain I sewed out of some clearance material I picked up a while ago. It's not a perfect match, but it works.
I placed the fridge and kitchen in her room. Added a table and chair set and her dolls high chair. 2 months later...Done (minus the facet)
I am pretty happy with how it turned out.


 I pined the trim onto the blue fabric and sewed it on. Using four of the ties (originally used to tie the bumper to the crib) on each corner. Then I sewed the blue fabric and animal patterned fabric together (right sides in). leaving a little space to turn it right side out. I hand sewed the hole shut. Added 5 tassels of yarn throughout the blanket to hold the two pieces of fabric together. And, done. Simple, easy and cute. Only took me 2 hours. From the time I cut the fabric to the time I took the last photo. Not to bad for a homemade item.


